Showing posts with label gluten free. Show all posts

Wednesday, May 19, 2010

A New Take on the Bean Cake

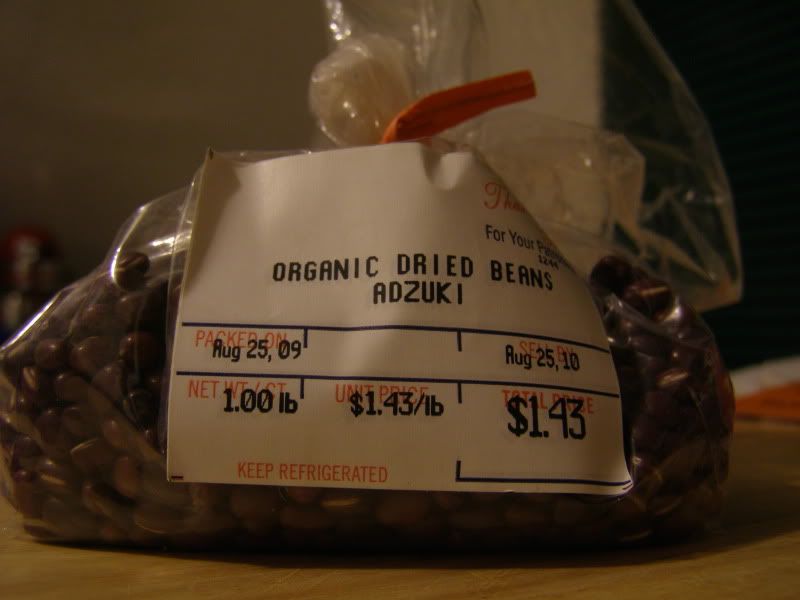
I have this one really awesome ingredient in my cabinet.


Oops haha! I didn't notice that "keep refrigerated" type on there before.. oh well!

Anyway, I wanted to make something with these little guys! The poor things were starting to feel neglected, having lived in my cabinet for 3 months! As luck would have it, I remembered seeing a recipe for a garbanzo bean cake.

"Why couldn't I do the same with my adzukis??"

Well I could! And I did!

TADA!!


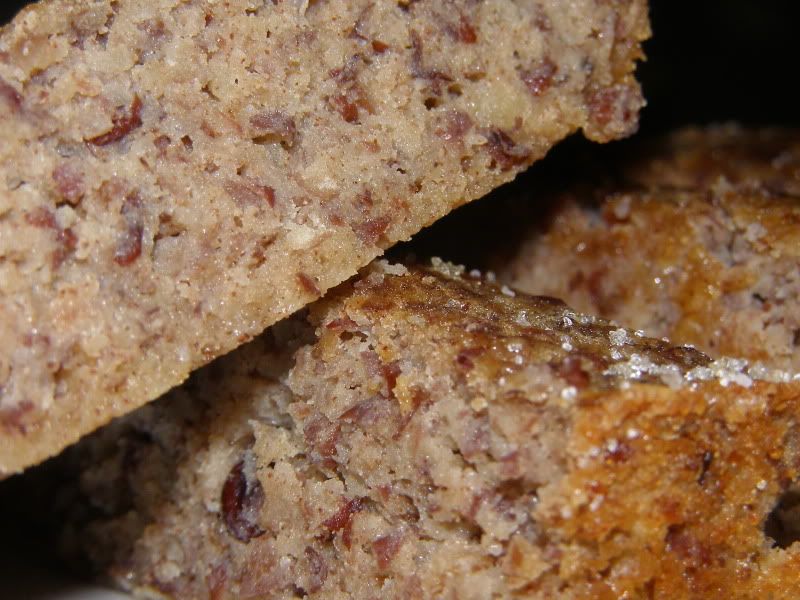
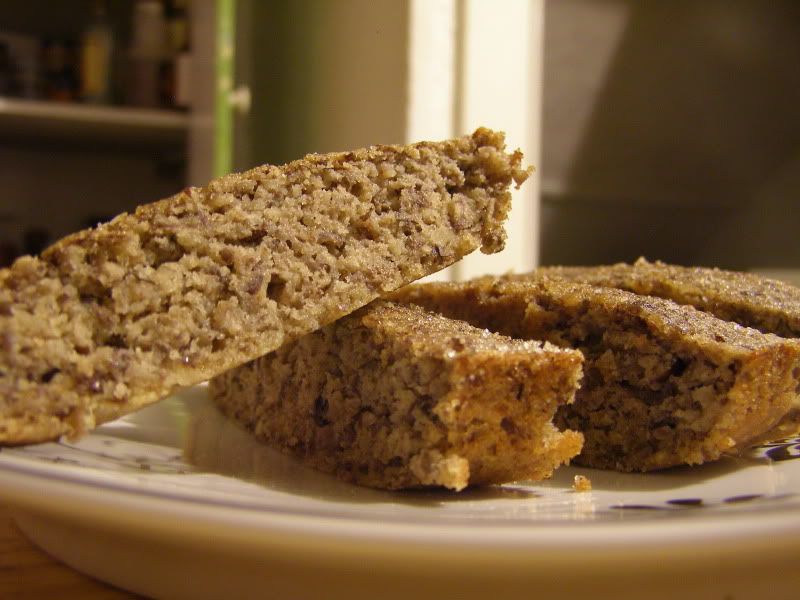
Man-o-man-o-man this cake is so moist and delicious! Who'd have thunk it?? Plus it has pretty speckles, contains lots of fiber AND it's gluten free!


Adzuki Cinnamon Cake
1 cup adzuki beans, cooked and drained
2 eggs, beaten
1/4 cup sugar
1/4 cup brown rice flour
1/2 teaspoon baking powder
1 teaspoon cinnamon
1/3 cup pineapple juice

Preheat oven to 350 degrees. Generously butter a one pound loaf pan and dust with granulated sugar.

Puree beans in food processor until smooth - mine were of a crumbly consistency since the beans were a bit on the al dente side. Pour beans into a large bowl; stir in eggs, sugar, flour, baking powder, cinnamon and pineapple juice until well combined. Pour mixture into the loaf pan and bake for 30 minutes or until a toothpick inserted in the center comes out clean. After removing from the oven, sprinkle a pinch of kosher salt on top. Cool thoroughly, slice and serve!

Tuesday, May 18, 2010

Fiesta in a Casserole Dish


"Can you help me search for a recipe? I want to make a vegetarian dish to bring to the lock-in," Kyle says to me Friday afternoon.

Not one to turn down a recipe search, I accepted the challenge.

My first, and as it turned out, final, stop was the vegetarian section of Simply Recipes. I've followed Elise's blog for years. Everything I've ever made from her website has turned out beautifully. Whenever someone asks me for a recipe reference, I point them in the direction of her site. So when Kyle asked me for a vegetarian recipe, I linked him her Polenta Casserole recipe. Little did I know that this would spark my own creative juices flowing.

Once I started digging through my pantry and fridge, I realized I didn't have half of her listed ingredients. Never fear! Its in my DNA to substitute everything and anything in a recipe. Really, my mom does it, my Grandma does it... we've been trying for years upon years to recreate Grandma's spaghetti sauce recipe. We still haven't figured it out.

Mom says she spits in her sauce... I'll bet that's the secret...
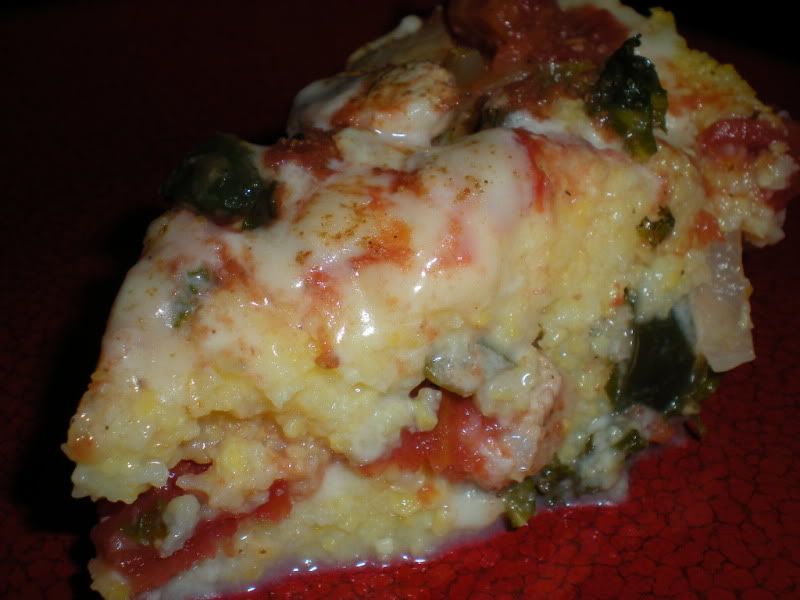


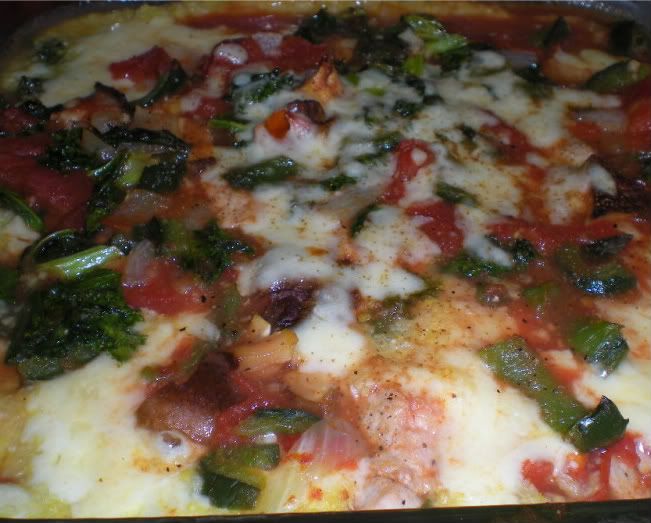
Anyway, I pinched here, tweaked there, added some sauteed pork and came out with a Mexican inspired casserole recipe. Deliciouso!

Mexican Grits Casserole
1 pork chop, seared in a hot pan with celery salt and pepper and chopped
3 tablespoons olive oil
1/4 vidalia onion, chopped
1 large pablano pepper, chopped
1/2 cup kale, chopped
1/2 cup chopped mushrooms (I used dried shitake, since that's all I had on hand)
4 garlic cloves, minced and divided in half
1 14.5 ounce can diced tomatoes
3 cups water
1 cup grits
1 cup grated cheese (just use your favorite, I used Mexican melting cheese)
Celery salt and pepper to taste

Heat olive oil in a large saucepan on medium heat and saute onion, kale, pablano and mushrooms, seasoned with celery salt and pepper, until onion starts to turn clear and kale starts to shrink down. Add in tomatoes, pork and 2 garlic cloves. Simmer for about 5 minutes, remove from heat and set aside.

Preheat oven to 350 degrees, brush an 8x8 glass baking dish with canola oil and set aside.

In a large saucepan, bring water to a boil. Add in garlic and a pinch of celery salt. Reduce heat to low, whisk in grits and cook until thick and cooked through. Be sure to wear socks during this step of the recipe... I burnt my foot from the spluttering grits!!

In prepared baking dish, spread 1/3 of the tomato mixture. Pour half the grits mixture on top of the tomato mixture, smoothing into corners. Sprinkle the grits layer with cheese. Repeat this process again, then top with the last bit of tomato sauce. I had a little cheese leftover, so I just piled it on top of the last layer.

Bake about 25 to 30 minutes and let cool about 15 minutes before serving. Like real live lasagna, this dish tastes delicious after sitting for a few days in the fridge.
The Amazing Purple GF Torte


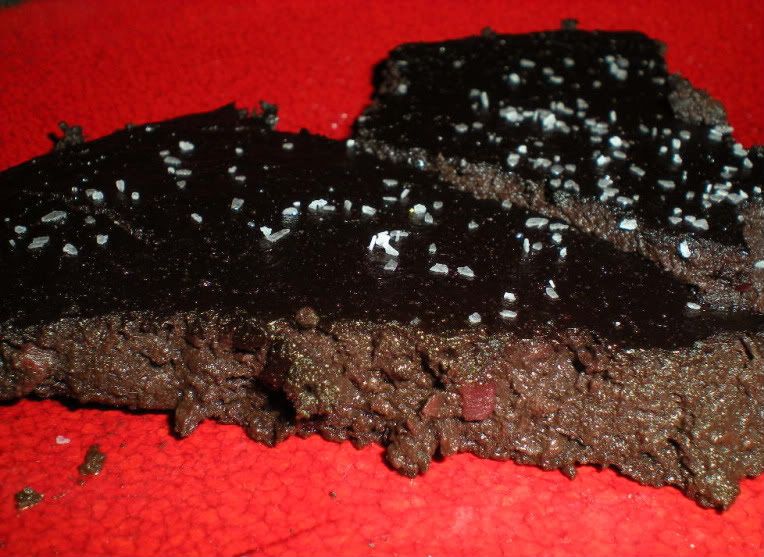
I’m not gluten-free anymore, but I still enjoy baking that way once in a while. It’s refreshing to say that you’ve created something without flour! Though the torte was super difficult to get out of the pan, I enjoyed the bittersweet chocolatey pudding-y solidity of its consistency.

Yes that’s my technical term for the consistency of this cake.

Pudding-y solidity.

Want to hear the absolute best part of this recipe? I know you do...

It has 500 calories. No, not for a slice, for the whole entire cake! I know, it doesn’t seem possible, but oh my it is. I am tempted to sit down with a fork and the pan to eat the whole thing. Somehow I feel that would be a bad idea for my poor tummy, though. But hey, where else can you get such decadence for so few calories?

Purple GF Torte
1 14 ounce can beets (the kind with just beets and water), rinsed
1/4 cup cranberry sauce (I used canned, but you could probably use fresh, too)
1 tablespoon molasses
2 eggs
1/4 cup dark cocoa powder
2 1/2 teaspoons vanilla extract
1/2 teaspoon almond extract
1/4 teaspoon salt plus more for sprinkling

Preheat oven to 350 degrees. Grease a 9-inch cake pan, then dust with powdered sugar. Set aside for later use.

In a food processor, add beets, cranberry sauce and molasses. Puree together, then pulse in eggs, cocoa, extracts and salt until well blended. Pour mixture into the cake pan and bake for 30 minutes or until a toothpick inserted in the center comes out clean. Remove from oven and sprinkle with coarse salt. Cool the torte, slice and serve as desired.

Saturday, May 15, 2010

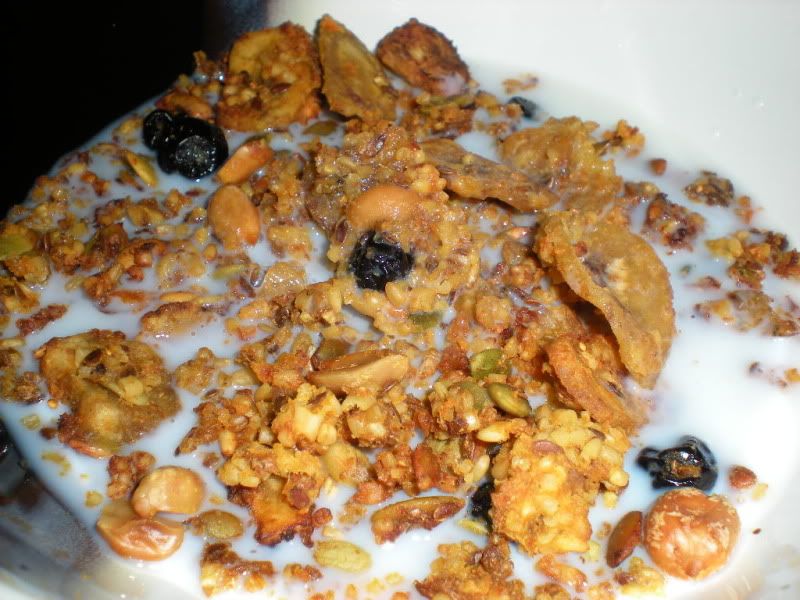
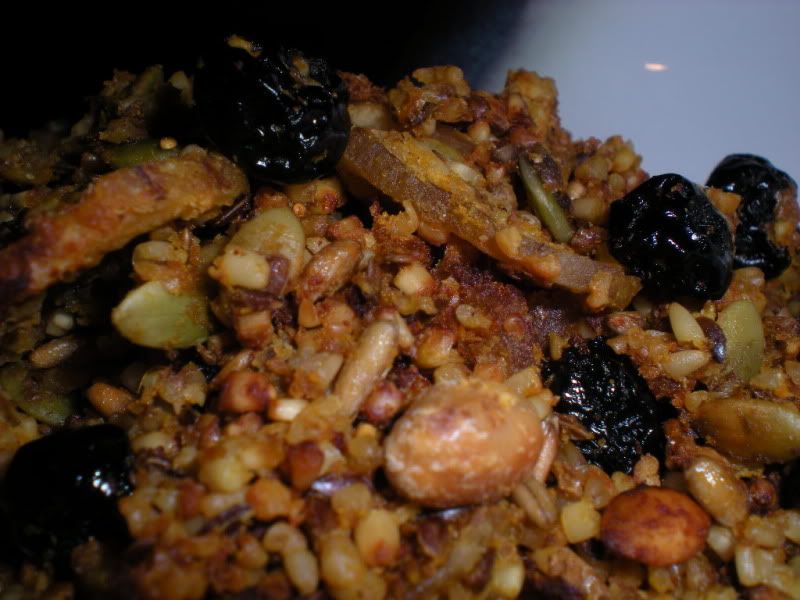
Sweet Potato Granola


I’d like to start off this post with a shout out to Kankakee Natural Foods. This is and has been my favorite store in the area since I discovered its existence about a year ago. Best unsweetened dehydrated banana chips this side of the Rockies. Well maybe. I don’t really know what the deal is with banana chips over there in California. Probably pretty substantial, though. Maybe if I go over there someday I’ll find out.

Anyway, so I’m standing at the checkout counter with my granola-making purchases when I suddenly acquired a taste for dried blueberries. I asked the girl behind the counter if they ever dried their own blueberries. She said they didn’t, but they did get in packages of them. She walked over and grabbed them off the shelf to show me. It saddened me that they were teensy bags.

Damn blueberries for being so tiny and delicious and not being grown in my area – therefore expensive!! I thanked her for showing me and proceeded to the door as she returned the blueberries to their shelf.

Then the clouds parted! She waved me down and walked toward me carrying several shiny, beautiful bags of dried blueberries. It turns out that they were a few months past their shelf date and they weren’t allowed to have them on the shelf anymore. She said they were mine if I wanted them and all I’d have to do is just throw them out if they weren’t any good.

I thanked her profusely, practically jumped up and down like a child going to Disney World! Free dried blueberries! Woo-hoo!!

I rushed home to make my granola!


This recipe is inspired by a recipe for Maple Pumpkin Granola I ran across on Sugar Plum. I already have a favorite granola recipe, but it’s not exactly the most figure friendly one. It has lots of peanut butter, butter, honey and chocolate... I have to save it for special occasions.

So here’s my granola recipe. And if by some chance there’s some ingredient you find appalling, just swap it out with something you like! This mixture seems to be pretty delicious completely unbaked or even partially baked. Filling and delicious in any form!

Sweet Potato Granola
1 cup steel cut oats
1/3 cup rye berries
1/3 cup raw pumpkin seeds
1 cup unsweetened banana chips
1/4 cup dried blueberries
1/8 cup flax seed
1/4 cup All Bran cereal
1/4 cup unsalted peanuts
1 medium sweet potato, peeled and cooked
3 dried figs
1 tablespoon tahini paste
2 tablespoons olive oil
1 tablespoon unsalted butter
1 teaspoon mango extract
1/4 to 1/2 cup water
1/4 teaspoon kosher salt

Preheat oven to 350 degrees. Lightly oil a baking sheet with canola oil and set aside. In a bowl mix oats, rye berries, pumpkin seeds, banana chips, blueberries, flax seed, cereal and peanuts. In a food processor, puree sweet potato, figs, tahini, olive oil, butter, extract, water and salt. Combine oats mixture and sweet potato mixture. Spread onto the cookie sheet and bake for 45 minutes to an hour, stirring the ingredients up halfway through.

Sunday, May 9, 2010

The Unbearable Lightness of Bean

On Prudence Pennywise, a blog I follow, I was struck by her post about a recipe for "unrefried beans". I am a huge fan of refried beans but the whole lard factor is pretty off-putting if you're watching your girlish figure. Seeming to read my mind, my mom produced a bag of dried pinto beans from her magical pantry and my dream of reproducing this recipe became a reality! I followed the recipe mostly, adding a bit more water since I did not use a can of taco sauce. I diced up a few jalapenos and some garlic amongst a few other choice ingredients and my concoction has been simmering in the crockpot for a few hours. I look forward to tomorrow morning when I can mash the beans up and see how the recipe turned out. Beans, beans, beans!!

Update: This morning I padded out of the bedroom at 2:30 toward the heavenly aroma the crockpot was emitting. I removed the lid and peered inside.. Now for all the good smells in the world, pinto beans are just not pretty. You won't find a photo of them here but I will tell you that they tasted just delicious. But I'm getting ahead of myself here. I turned that crockpot off (it had been simmering for 7 hours at that point) and went back to sleep. After waking up for real this morning, the beans mostly cooled, I followed a suggestion posted on Prudence Pennywise's site. A clever blogger stated that he or she used a slotted spoon to ladel the beans into their kitchen aid and mash them up using the paddle on the second setting. This worked like a dream and saved me from having to use those arm muscles to mash em up. I saved the "stock" the beans created and used it to cook my fish for lunch. Protein OVERLOAD! =)

Mint Marinade

So a few nights ago, I was experimenting with some marinades for some eye of round I was cooking for dinner. My friend Amanda had dropped off some fresh mint leaves from her mom's garden. I've been using it in everything from my coffee in the morning to crushing it for my lemonade. I figured I'd give it a shot with the beef! I chopped up a half of a jalapeno, some fresh garlic, a handful of the fresh mint and a few tablespoons of pomegranate balsalmic vinegar I had on hand. I marinated the steak, after cutting it into bite sized pieces, in the fridge for a day. I then seared it in a pan on the stove using a bit of extra virgin olive oil and stuck it in the grits I whipped up for dinner. Aside from salting the grits a bit heavily, the dish was pretty tasty. I mean, who doesn't love steak flavored grits??

Wednesday, May 5, 2010

Crockpot Garam Masala


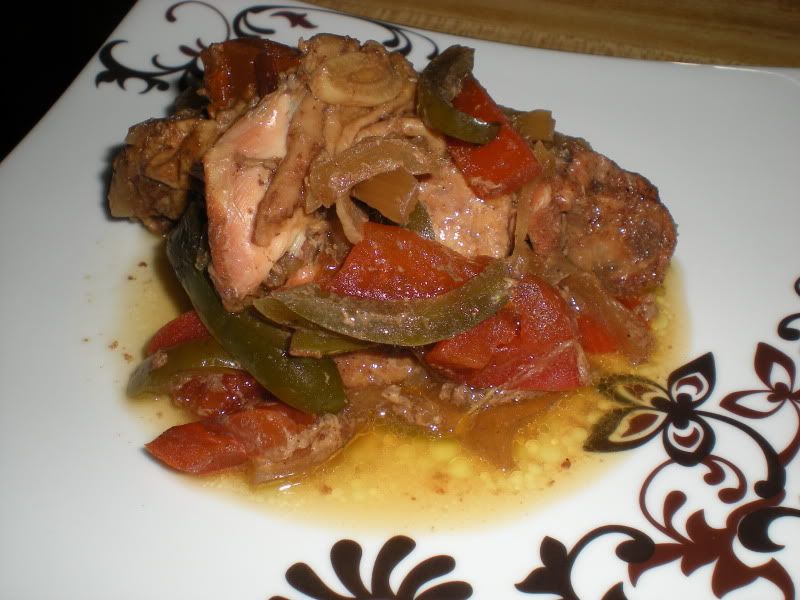
Thanks to a recent trip to the grocery store, I finally had a chance to create my own chicken recipe using the garam masala spice mixture Kyle so thoughtfully sent to me. I've recently grown very fond of green peppers, but if you're not a fan you could substitute any other color you'd like. This recipe was rich in flavor, incredibly tender and would taste fantastic over a bed of rice. I hope you enjoy it as much as I did!

Crockpot Chicken Garam Masala
4 chicken thighs
1 tablespoon garam masala
1/2 teaspoon powdered ginger
1 plum tomato, diced
1/2 vidalia onion, diced
1/3 green pepper, thinly sliced
4 cloves garlic, thinly sliced
2 1/2 cups water (or chicken stock)
1 tablespoon butter
Salt and pepper to taste

Rinse chicken thighs and massage garam masala and ginger into chicken. Set in crockpot. Add all remaining ingredients and refrigerate overnight to allow flavors to blend. To prevent crockpot from cracking, allow dish to sit out for an hour before heating. Turn crockpot on low and simmer for around 8 hours. The chicken was so tender that the meat just fell off the bone. Pretty low maintenance, but definitely delicious in my eyes.

Thursday, March 11, 2010

Green is the New Red


They're having a St Patrick's Day party at the bank next Wednesday! Woo hoo for corned beef! So there we were, discussing what else to bring. The thought occured to me, why not make green velvet cake? You know, red velvet cake with green food coloring instead of red to make it Irishly festive! I found a recipe that was a take on Paula Deen's here and altered it a bit. I split the recipe in half and made it gluten free with white rice flour. It turned out perfectly, I had JUST enough sugar in the cabinet. Phew! In fact, they were so good that I took them to various friends this morning so I wouldn't be tempted to eat any more.

Disclaimer: Eating the batter will turn your tongue green.

Enjoy this early St Patrick's Day treat!

Green Velvet Cupcakes
1 1/4 cups white rice flour
3/4 cup sugar
1/2 teaspoon baking soda
1/2 teaspoon salt
1 tablespoon dark cocoa powder
1/2 cup buttermilk(1/2 cup milk plus 1/2 teaspoon white vinegar rested for 5 minutes)
3/4 cup extra virgin olive oil
1 large egg, room temperature
1 tablespoon green food coloring
1/2 teaspoon distilled vinegar
1/2 teaspoon vanilla extract

Preheat oven to 350. Mix together dry ingredients. Set aside. Mix together wet ingredients (be careful not to fling green everywhere). Add dry ingredients to wet ingredients and mix until smooth. Divide the batter up into cupcake tins lined with those little papers. I used a mini cupcake tin since that's all I have papers for, but you could just as easily use a large cupcake tin. I didn't really time them, I just kept an eye on them and checked with my trusty plastic cocktail sword to see if they were done inside. I'd say about 8 minutes or so. Once the sword came out clean, I took them out. They were rich and moist and delicious. I plan on making these again Tuesday for the party on Wednesday, only with some melted white chocolate drizzled over the top.. yum!

Wednesday, March 10, 2010

Curried Grits with Peas


As is usually my dilemma after work, what to whip up for dinner? I kept running options through my head; peanut butter quinoa, rice cakes with peanut butter (I've been craving peanut butter lately) when I settled on something completely different. I wanted a pilaf type dish, but have no rice. I opened the cabinet and there they were staring at me - grits! This oddball dish was so surprisingly wonderful that I know it will soon become a staple.

Curried Grits with Peas
1/2 cup grits
1 cup milk plus 1/2 cup water
1/2 cup frozen peas
1/4 teaspoon curry powder
4 dried shitake mushrooms, broken up
Palmful kosher salt
1/4 cup cheese, I used monterey jack but I think asiago would be excellent too

Add grits, milk, water, peas, curry powder, mushrooms, and salt to pot and bring to a boil. Keep boiling for 5 minutes, stirring to keep from grits from clumping, or until mixture thickens. Remove from heat and stir in cheese. Serve hot and enjoy!

Mango Lassi

I was watching the Food Network yesterday and saw a guest on Bobby Flay's Grill It make a mango lassi. My mouth started watering.. then it hit me: I have a mango at home! And some yogurt! I don't have cardamom, but cinnamon will work.. done! So yesterday afternoon I whipped one up. It was pretty delish, let me tell you. There's no photo because the mug I put it in was camera shy. Next time I'll post a picture!

Mango Lassi
1/2 mango, cubed
5 tablespoons milk (more if you like it a bit thinner)
4 tablespoons plain yogurt
1/4 teaspoon cinnamon
1/4 teaspoon fresh ginger
Agave nectar to taste

Add all ingredients in blender and puree until smooth. Pour over ice and enjoy!

Nectarine Chipotle Pizza


Last night I had the brilliant idea of making a "fruit pizza". I haven't had the courage to attempt making my own pizza dough, so I use the stuff in the bag, Chebe. It's pretty tasty for being prepackaged. I followed the directions on making up the dough, but made up my own rules as far as baking went. I love the combination of sweet fruit with salty cheese on my pizza, so this really hit the spot!

Nectarine Chipotle Pizza
1 nectarine, thinly sliced
1 small apple, thinly sliced
1/2 small onion, thinly sliced
1 chipotle pepper, thinly sliced
1/4 cup sliced or shredded cheese, I used monterey jack
Handful of walnuts
1 package Chebe GF pizza dough mix

Prepare Chebe dough according to package directions, using 3 tablespoons of milk rather than 2. Roll out and transfer to ungreased pan. Bake in preheated 350 degree oven for 10 minutes. Heat up about a tablespoon of olive oil in a pan and saute onions and chipotle together until almost carmelized. Spread onion mixture evenly over pizza crust, then sprinkle with walnuts. Arrange nectarine slices and apple slices on pizza, then cover with cheese. Return pan to oven and bake until the cheese gets all melty and delicious. Remove from oven, slice up and ENJOY! Mmm!

Monday, March 8, 2010

A New Twist on Blue Cornmeal


I discovered this recipe months ago and finally made them last night. Boy were they worth the wait! The original recipe can be found here as I have changed some ingredients involved. Be careful, she wasn't kidding when she said the dough almost won't make it to the oven..

Blue Corn Chocolate Chip Cookies
1/3 cup plain yogurt
1/2 cup Smart Balance 50/50 butter, softened
1/3 cup sugar
1 teaspoon vanilla extract
3/4 cup blue cornmeal
3/4 cup white rice flour
1/4 teaspoon baking powder
1/2 cup chocolate chips
1/2 cup chopped walnuts

Preheat oven to 350. Cream together the Smart Balance and sugar, then add vanilla and yogurt. Add blue cornmeal, flour, and baking powder. Mix well. Add in chocolate chips and walnuts.

Place heaped spoonfuls of the dough on ungreased cookie sheet and pat down so they're sorta flat. Sprinkle some sea salt on the flattened dough. After the first batch, I noticed that my cookies didn't spread and the color doesn't change much. I altered my baking time to 15-20 minutes or until they were a nice golden brown on the bottom. Transfer to cooling rack and allow to cool.

The Great Red Bean Experiment

I have finally done it! I've mashed the beans, made the dough, steamed the buns, and made.. RED BEAN CAKES! These are not your ordinary cakes. I put my own personal spin on them, of course. Quite some time ago I made sweet potato biscuits with sage gravy.. now let me tell you, making biscuits is HARD WORK! I haven't made them since, but decided this was the right time to pull them out and use them for my experiment! I borrowed my dad's bamboo steamer and went to work on creating!

Red Bean Stuffed Sweet Potato Biscuits
For the Red Bean Paste:
1 cup red adzuki beans
1/2 cup sugar

For the Biscuits:
3/4 cup cooked, mashed sweet potatoes
1 1/4 cups white rice flour
2 tablespoons butter
2 tablespoons extra virgin olive oil
4 teaspoons baking powder
2 tablespoons sugar
1/2 teaspoon salt
3 tablespoons milk

Cook up the beans on the stove until they're nice and soft, this will take roughly 2 hours and you will have to keep adding more water as they cook. Once all nice and soft, mash the beans up and add the sugar. Mash it some more until the sugar is all incorporated, then set aside.


Mix together the flour, sugar, baking powder, and salt. I cheated a bit on this next step. Since I cooked up the potatoes the same day, I just added the butter into the steaming mashed potatoes along with the oil and mixed them up that way. Add the potatoes (& Co) to the flour mixture and combine well. Add milk and mix until the mixture looks nice and doughy, like this!


Here comes the messy part.. this dough is rather sticky and requires quite a bit of flour to roll out. I regret that I did not take more photos of this, but I was alone and had messy fingers! I took about a third of the dough at a time and worked in some all purpose gluten free flour to make it suitable for rolling (in other words, so it wouldn't stick to my makeshift rolling pin: the outside of my pushup measuring cup!) I rolled the dough out into about quarter inch or so thickness and cut them out using the same tool I rolled with, which turned out circles about two inches across. I then took roughly a spoonful of red bean paste, placed it in the center of one of my dough circles, covered it with another circle, and smoothed the edges closed so they were seamless. I repeated this process over and over again until I had very little paste and very little dough left. I mixed the two together and made two buns out of them.


I then left my little buns in the fridge for 3 hours while I ran out to visit my Grandma and play with my niece. When I came home, it was time to STEAM!! Since I don't have a wok, I set up the bamboo steamer on my big red pot and added some lavender to the water for flavor. I set about four buns at a time in each basket (on top of some wax paper) and let them steam for about fifteen or so minutes.


Now, this is going to be hard, but try to let them cool before you remove them from the wax paper or they'll fall apart! Once they're off the paper.. it's munching time!

Thursday, March 4, 2010

Almond Sesame Truffles


So I didn't exactly measure out amounts in this recipe, so its more of an idea booster! Plus the picture was gorgeous and I wanted to use it! This recipe was inspired by the Sesame Seed Truffle recipe on Elana's Pantry. I took some tahini paste and combined it with some awesome ingredients to produce these decadent little treats. It was just an experimental recipe and only made about ten truffles. I brought them to a family gathering and those who were brave enough to try them enjoyed them (my family is a bit odd on the texture front). So here is my "sort-of" recipe!

Almond Sesame Truffles
3 tablespoons tahini paste
1/2 cup almonds
4 dried figs
1 teaspoon (give or take) milk
Agave nectar to taste
Mixture of unsweetened cocoa powder, sugar, and cinnamon (to your tastes)

Mix tahini paste, almonds, figs, milk, and agave nectar in food processor until a smooth paste is formed. Refridgerate overnight. Roll mixture into balls and roll in cocoa powder mixture. Serve immediately - they're more firm when cold

Tomato Basil Bread


I'm so proud of this recipe! The original recipe I discovered on Fran's House of Ayurveda (her Olive Walnut Bread) and thought it sounded delicious. Of course, empowered by my banana bread success, I sought to convert it to a gluten free recipe. I glanced in my pantry.. no olives. Why does this always happen? I did, however, have one sun dried tomato and one plum tomato. I changed changed a few ingredients here and there and Tomato Basil Bread was born! I know walnuts and tomato sounds like an odd combo, but the result was just divine. In the future I might add a tad more oil or take the bread out of the oven sooner to keep it a bit more moist, but on the whole I was pleased with the results!


Tomato Basil Bread
2 cups brown rice flour
1/2 cup GF all purpose flour
1/8 cup flax seed
1 tablespoon baking powder
1/4 teaspoon kosher salt
1 tablespoon dried basil
1 large egg
1 plum tomato, diced
1 sun dried tomato, diced (more if desired)
1 cup skim milk
1/4 cup extra virgin olive oil
2 tablespoons agave nectar
1/2 cup walnut pieces

Preheat oven to 350 and grease a loaf pan. In a large bowl, thoroughly combine flour, flax seed, baking powder, salt, and basil. In your mixer, combine milk, olive oil, egg, and agave nectar until well blended. Add in flour mixture along with tomatoes and walnuts. Pour mixture into loaf pan and bake 45 minutes or until a knife inserted comes out clean. Enjoy with some hummus or walnut butter.. mmmm..

Tuesday, March 2, 2010

Hummus! I got the hummus!


There's a birthday celebration at the bank tomorrow and I wanted to make a healthy treat to balance out the chocolate I know will be present! I found a delicious recipe for hummus to eat with the homemade bread I made. I am a huge fan of garlic (there's no way any vampire would come within ten feet of me) but thought that the raw garlic might knock our customers over. I decided the solution would be to quick-roast the garlic in a pan over the stove. This was simpler than I expected: just leave the skins on the garlic and let them take a spin around a hot, dry pan until they smell all yummy and buttery, then slip the skins off. The best part of this recipe is how incredibly simple it is to prepare.. once again I bow to my food processor!

Lemon Garlic Hummus
1 16 oz can garbanzo beans, well rinsed
1/3 cup tahini paste
4-5 tablespoons extra virgin olive oil
3 cloves of garlic, roasted
Juice of one lemon
Kosher salt and pepper to taste

Add beans, tahini paste, and garlic to food processor and blend well. Add remaining ingredients and continue to process until a nice paste is formed. Serve with chopped veggies, bread, crackers; whatever you crave! You could serve this right away but I'm allowing mine to sit overnight so the flavors can mingle.

Saturday, February 27, 2010

Mmm soup.. I mean noodle soup.. I mean soup..


I love sweet potatoes. They're naturally sweet, delicious, and best of all.. they're ORANGE! After craving them for months on end, I finally purchased a few. I pondered what to do.. bake them straight, make a smoothie I found online.. then it dawned on me. Make a soup!! I threw some tastiness in a pot and let it simmer for a few hours and voila!

Warning: This soup is a tad on the spicy side, I think the next time I might reduce the amount of chipotle and throw in some diced chicken.

Sweet Potato Soup
1 medium sweet potato, peeled and chopped
1/2 onion thinly sliced
1 clove garlic, crushed
1 can butter beans, well rinsed
2 chipotle peppers, diced
2 tablespoons golden raisins
2 1/2 cups water
1/2 cup skim milk
1 cup corn
A pinch of lemon zest
Dash celery salt, pepper, and cinnamon, to taste

Combine all ingredients in slow cooker. Cook on high for an hour, then reduce to low and simmer until potatoes are done just the way you like them. You can puree the soup if you'd like a more consistent look, but I just left it alone. Enjoy!

Lavender Butterscotch Blondies

lavenderblondies

Definitely not the prettiest thing I've ever made.. but a superbly sweet treat for that sweet tooth! This is another recipe I whipped up to add Kyle's monthly care package! I got this recipe from another gluten free blogger who adapted the recipe from the Joy of Cooking. As you know, I can't leave any recipe well enough alone so I added some lavender to the mix. I chose lavender because I wanted Kyle to try something truly unique. This recipe is very gooey and at first I was afraid that I wouldn't be able to send my creation in the mail. I threw the pan in the refrigerator overnight to firm the blondies up. This worked like a charm and I was able to add them to the box!

Lavender Butterscotch Blondies
3 tablespoons butter
1 cup packed brown sugar
1 egg
1 teaspoon vanilla
1/2 cup rice flour
1 teaspoon baking powder
1/2 teaspoon salt
1/2 teaspoon lavender

Preheat oven to 350 degrees. Melt butter in microwave and stir in brown sugar until completely moistened. Let cool slightly, then stir in remaining ingredients. Pour into a well greased 8x8 pan and bake 15 to 20 minutes. Cool and cut into squares.

(She suggests adding 1/2 teaspoon xantham gum if you want to double the recipe, but I refuse to cook with the stuff, as I don't like the sound of it. I know, strange, but that's me!)

Molasses Globs

molassescookie

It's that time of the month.. the time to send Kyle goodies through the mail! I really love to send him cookies or whatever I can fit into the mailbox and send out. I didn't have the ingredients for his favorites from the last time I sent him cookies, so I searched my cookbooks for a new one. I broke open this cookbook I've had for years, Milk'n'Honey Cookbook for Kids and altered the cookie recipe in it. The original recipe calls for margarine, honey, and raisins. Kyle doesn't like raisins, I don't like margarine, and I've been wanting to bake with molasses. These cookies turned out delightfully unique and tasty! I sent them out to Kyle and he absolutely adores them. Good thing I kept a baggie full of dough in the freezer to nibble on..

Molasses Globs
3/4 cup packed brown sugar
1/2 cup softened butter (1 stick)
1/4 cup molasses
1 large egg
1 1/4 cups rice flour
1 teaspoon baking soda
1 teaspoon ground cinnamon
1/4 teaspoon salt
1 1/2 cups oats
1/2 cup chocolate chips
sugar and cinnamon

Preheat oven to 375 degrees. Grease cookie sheet (I only have one that I can use since my oven is the size of a tissue box..) with some olive oil. Mix together brown sugar, butter, molasses, and egg. Slowly add flour, baking soda, cinnamon, salt, and oats until well blended. Mix in chocolate chips until just blended. Roll dough into balls about the size of .. well.. it says walnuts but I just kinda guestimated since I have no idea what the size of a walnut is. Place the cookies 2 inches apart on baking sheet. Press the balls flat with a spoon dipped in sugar and cinnamon. Bake about 10 minutes or until lightly browned and edges are set. Remove from pan and cool on a wire rack. Then enjoy!!

Friday, February 26, 2010

Banana Bread Bonanza

nannerbread

Last night I had a conundrum; I wanted to bake banana bread but did not have a gluten-free recipe for it. Sure, I had a recipe for regular banana bread (taken from the Grandma's Touch cookbook my mom bought me years ago) but I vividly remember the last time I tried to convert a recipe to gluten free. Let's just say it turned out to be chocolate GOO rather than brownies. Haha! But I really wanted banana bread.. so I gathered up my courage and converted it anyway! As I'm happily adding ingredients into my mixer, I was horrified to see that the recipe called for 1 CUP of bananas rather than 1 banana in itself. No wonder the mixture looked so runny. I grabbed some banana chips off the shelf of the pantry and crushed up a handful or so of them and threw them into the mixture hoping that would solve my problem. Well I don't know if it solved things or not, but the bread came out beautifully and is a big hit at the bank! Hooray for banana bread success!

Banana Bread
1 3/4 cups brown rice flour
1/8 cup flax seed
1/2 teaspoon baking soda
1 1/2 teaspoon baking powder
1/8 teaspoon salt
Handful crushed banana chips
Cinnamon, to taste
3 tablespoons olive oil plus 1 tbspn butter
3/4 cup brown sugar
1 egg
1 mashed banana (I just broke up the banana and let the mixer mash it in)
1 cup skim milk

Preheat oven to 350 degrees. In a large bowl, beat together oil, sugar and egg. Add bananas and milk; combine well. Add remaining ingredients and mix well. Pour batter into a greased and floured 5 x 9" loaf pan. Bake for 50 minutes or until inserted toothpick comes out clean.