Monday, May 31, 2010

Bluebeery Bread

I finally bought it!


The awesome Wild Blue beer of my dreams! Blueberry flavored beer! Mmm!!

Yeah I know, I hadn’t heard of it before either. But, you see, over at Sugar Plum, there is an awesome recipe for Brewberry Brownies. Since I read that post about a month ago, I’ve had a taste for the elusive beer. I finally discovered that my local Ultra (Skultra to those of us that live around here haha) carries it. I got the LAST CASE on the shelf.

Go me!


I wasn’t really in the mood to make brownies, so I decided on beer bread. I used a recipe from my Grandma’s Best cookbook, swapping out a few herbs for ones I thought would go best with the exotic beer.

It smells incredible while baking and turns out nice and crusty on the outside while wonderfully moist and blueberrylicious inside!


Bluebeery Bread
2 3/4 cups all purpose flour
2 tablespoons sugar
2 tablespoons baking powder
1 teaspoon kosher salt
1/2 teaspoon sage
1/4 teaspoon ground ginger
1 12-oz bottle Wild Blue beer

Preheat oven to 375 degrees. Grease a loaf pan with butter and set aside. Mix together flour, sugar, baking powder, salt, sage and ginger. Add beer and mix well. Pour batter into loaf pan and bake for 50 minutes. Let stand for 10 – 15 minutes and remove from loaf pan to cool completely.

Challah Swirl


Happy long weekend to you all! I love this time of year. Everyone fires up their grills and cooks up some awesome grub, Bobby Flay style! I love Bobby Flay, he's so fun to watch. I caught his story on that "Behind the Chef" thing on the Food Network one day, such an amazing story, too. You should try to watch it sometime!

Sadly I don't own a grill. I know enough people that do have one to sustain me for a while I believe. =) Such as my parents with their awesome grilled quesadillas!


My recipe has nothing to do with grills or meat, however. Oooh I just got an idea. When I get my own grill I could bake it in there! Perhaps it would first be a better idea to learn to not burn a hot dog on the grill as my first outdoor chef-ing experience..

I've been searching for a bread recipe that doesn't seem too complicated for my novice bread-making hands to conquer. After getting an email about 55 Knives, a blogging cookbook that was put together and just came out for download, I noticed one contribution was from a blog named Sticky, Gooey, Creamy, Chewy. I giggled at the name and browsed around her site. I stumbled upon a post for Cinnamon Raisin Swirl Challah. Now I've never had challah before. That I can remember. But it looked so good... this was my ticket!


I mixed up the ingredients and leaving it to rise while I watched my Teenage Mutant Ninja Turtles dvds (the original tv series, mind you) and had an unfortunate little mishap. Despite the 90 degree weather we've been having, the one day I decide to make bread the temperature decides to drop to the 60s. Two hours later when I checked on the dough, it had definitely not doubled in size. I moved it to sit on my dinky little warm oven where it promptly rose the way a nice yeast bread should. Good little bread **pat, pat**. I didn't have time for the rolling process until today, but the recipe said I could leave the dough in the fridge for up to 5 days before I'd have to freeze it.


Now as far as the filling goes, I used three different options. Since I made only half of the recipe, I made some mini loaves. One with goat cheese and a jalapeno-peach "jam" I made up on the stove, one with cinnamon and coffee, and one cinnamon raisin. I had a few problems with the centers of the last loaves baking through, but humidity is a killer. Next time I'll just have to have the air on!


Challah Swirl Bread
(half recipe: makes 2 regular sized loaves)
1/2 cup plus 6 tablespoons lukewarm water
2 1/4 teaspoons active dry yeast
1 1/2 teaspoons kosher salt
2 large eggs, whisked
1/4 cup honey
1/4 cup melted butter (or canola oil)
3 1/2 cups all purpose flour

From here I just followed the directions posted on Sticky, Gooey, Creamy, Chewy (I linked the page a little earlier). She has great step by step instructions written up!

Tuesday, May 25, 2010

Lavender Carrot Biscotti... sort of...


The Italians certainly have it right: cookies for breakfast!

I am absolutely head over heels for biscotti. Every year for Christmas, a really close family friend makes her famous Cappucino Biscotti for my dad and I. We usually take turns hiding the bag so we can have the last delicious morsel.

Well it's not really Christmas, but I'm in the mood for some crunchy Italian treats. With the temperatures rising, I wanted to bake something a bit lighter tasting than the rich flavors of cocoa and coffee. I opted for a mix of carrot with lavender and a hint of ginger.


Well, the result was a little more scone-like, but without the butter! Next time perhaps I'll try adding in an egg white or using only egg whites to keep it less moist. The flavor is still awfully delicious, though!

Lavender Carrot Biscotti
2 cups all purpose flour
1/4 cup millet flour
1/3 cup walnut pieces
1/2 teaspoon baking powder
1/2 teaspoon salt
1 teaspoon ground ginger
Pinch of nutmeg
2 eggs
1 teaspoon almond extract
2 tablespoons very hot water
1/2 teaspoon lavender buds
2 medium carrots, roughly grated

Preheat oven to 325 degrees. Oil a cookie sheet liberally with canola oil and set aside. Place the lavender buds in the hot water and allow to soak for at least 10 minutes. In a large bowl, combine flours, walnuts, baking powder, salt, ginger and nutmeg. In mixer bowl using paddle attachment, add carrot, lavender mixture, extract and egg. Beat until well combined. Add flour and mix well. Switch to kneading hook and knead dough for about 2 minutes, or until the dough pulls away from sides of the bowl. Shape into a log on the cookie sheet. For smaller cookies, and probably crisper results, shape into 2 logs. Bake 40 minutes. Remove from oven and cool for 10 minutes. Slice on a slight diagonal and place flat on cookie sheet. Bake for 10 minutes or until desired crispness is achieved. Cool completely before storing.

Saturday, May 22, 2010

Have Some Seeds with your Chocolate


It hit the 90s here and I got to wear a tank top!

>insert chorus of angels here<

Needless to say, I'm a little pink. With this goulishly fair skin I burn at the drop of a hat. It's that time of year to stock up on SPF600! Hehe!

Even though the heat is climbing here, I still feel the need to bake. I wanted to make up for the fact that my oatmeal cookies turned out to be such a disaster last night. After all, Kyle is still waiting on a care package for this month! Unfortunately I misplaced the chocolate white chocolate macadamia nut cookie recipe he loved so much. I finagled a few recipes around to come up with a chocolate chocolate chip cookie recipe with raw pumpkin seeds thrown in.

please excuse the camera shadow... technical difficulties!

They're not too sweet, since I cut way down on the sugar, and just a touch on the salty side. Plus this is a combination you don't see every day!

Chocolate Pumpkin Seed Cookies
2 squares bittersweet chocolate, melted
1 cup all purpose flour
1 teaspoon baking soda
1/4 teaspoon salt
6 tablespoons unsalted butter, softened
1/2 cup granulated sugar
1 teaspoon molasses
1 egg
1/2 teaspoon almond extract
1/2 cup raw pumpkin seeds
1/2 cup semi-sweet chocolate chips

Preheat oven to 350 degrees, grease a cookie sheet and set aside. Mix flour, baking soda and salt together in a small bowl and set aside. In a large bowl, beat butter, molasses and sugar on medium speed until light and fluffy. Add eggs and almond extract, beating until well combined. Add chocolate and do the same. Gradually beat in flour mixture, then stir in seeds and chocolate chips. Drop by heaping tablespoons onto the greased cookie sheet. Bake 11-13 minutes, cool on the cookie sheet for 2 minutes before transferring them to a cooling rack. Makes about 15-16 cookies.

Friday, May 21, 2010

Trash Can Mistake Cookies

Want to know what can lift your spirits on a dreary Friday afternoon?

When your coworker gets a box of free cookies as big as your hand and SHARES them!


See? I wasn’t kidding! They were as big as my hand! And there were four stacks of six or seven cookies! There were dark chocolate with white chocolate and macadamia nuts, dark chocolate with mint, chocolate chip and butterscotch walnut.


They were so incredibly yummy! Crispy and buttery, yet so soft and chewy… mmm…

Of course this sent my baking senses a-tingling. I wanted to create a cookie to send to Kyle. Think how much I’ll save on postage when he moves up here! I dug into my recipe box and found an oatmeal cookie from one of my mom’s friends. I only have steel cut oats and, as I found out, they don’t work the same as rolled oats.

I’ll post the real recipe here in case anyone wants to make her delicious oatmeal cookies. But first, I’ll tell you my crazy story!

Not wanting to make too many cookies, I quartered the recipe. I substituted those steel cut oats for rolled, like I mentioned before. I used brown rice flour instead of an all purpose, peanuts and added in some chopped up dried chili mango.


When I went to roll the mixture into balls, they wouldn’t stick together. Here’s where I started to fret a bit. I added in an egg. Oh no, one egg with a quarter of a recipe… that’s a recipe for cooked eggs with some oats inside. So I added 1/4 cup of millet flour. For good measure I tossed in 1/8 cup of butterscotch chips.


I dropped four heaping tablespoons onto my cookie sheet and started the baking process, excited to see what was going to happen!


Well, they were a lot fluffier than I wanted them to be. Yep, that was the egg talking. So to the remaining batter I added 1/8 cup more chopped mango. At this point I’d already decided the cookies weren’t going to be what I wanted to mail out. I decided to mix it up a bit! I threw in 1/4 cup cocoa puffs, 1/4 cup raisin bran, 1 tablespoon fresh pineapple, and 1 tablespoon tahini.


Yep I know it’s weird, but they actually tasted pretty good! Unfortunately they still weren’t the right consistency. Maybe next time I might just trust the recipe… Tee hee!

Carole’s Oatmeal Cookies
2 cups oatmeal
1 cup flour
1 teaspoon baking soda
2 sticks of butter or margarine (1 cup)
1 cup sugar
1/2 cup chopped nuts (optional)

Preheat oven to 350 degrees. In a mixer cream butter and sugar together. Add in baking soda and oatmeal. Stir in flour and nuts last. Roll dough into balls and place on cookie sheet. Bake for 10-12 minutes. Makes 3-4 dozen cookies.

Cinnamon Coffee Muffins

Nothing better than the morning coffee, eh?


After waking up at 5:00 this morning for the hour long group PT session at my gym, I still had 2 hours to kill before work. This is after getting showered and dressed. So what do I do?

Bake of course!

Maybe they have a bake-a-holics anonymous group I could join.

I adapted my Cherry Ginger Muffin recipe and made a bunch of mini muffins plus one regular sized muffin. Why the regular sized muffin? Well I ran out of space in the mini muffin pan and didn't want to wait until the first batch was done to reuse it!


I love the deliciously warm scent baking cinnamon leaves in the air. Combine that cinnamon with the smell of fresh coffee? I'm hooked.


I stacked up these yummy mini muffins in a nice little container and toted them off to work! Hooray for low fat treats!

Cinnamon Coffee Muffins
1 cup brown rice flour
1/2 cup whole wheat flour
1/2 cup raisin bran cereal
1/4 cup sugar
1 1/2 teaspoons baking powder
1/2 teaspoon baking soda
1/4 teaspoon salt
1 teaspoon cinnamon
1/2 teaspoon coffee grounds
1 cup strong coffee, cooled
2 tablespoons canola oil
1 tablespoon water
1 egg

Preheat oven to 400 degrees. Line a mini muffin pan with the little liners and set aside.

In a medium sized bowl, mix together flours, cereal, sugar, baking powder, baking soda, salt and cinnamon. In a separate bowl, whisk together coffee grounds, coffee, canola oil, water and egg. Make a well in the dry ingredients, pour in coffee mixture and stir until just combined. Fill muffin liners until almost completely full. Bake 10 minutes or until a toothpick inserted comes out clean.

Wednesday, May 19, 2010

A New Take on the Bean Cake

I have this one really awesome ingredient in my cabinet.


Oops haha! I didn't notice that "keep refrigerated" type on there before.. oh well!

Anyway, I wanted to make something with these little guys! The poor things were starting to feel neglected, having lived in my cabinet for 3 months! As luck would have it, I remembered seeing a recipe for a garbanzo bean cake.

"Why couldn't I do the same with my adzukis??"

Well I could! And I did!

TADA!!


Man-o-man-o-man this cake is so moist and delicious! Who'd have thunk it?? Plus it has pretty speckles, contains lots of fiber AND it's gluten free!


Adzuki Cinnamon Cake
1 cup adzuki beans, cooked and drained
2 eggs, beaten
1/4 cup sugar
1/4 cup brown rice flour
1/2 teaspoon baking powder
1 teaspoon cinnamon
1/3 cup pineapple juice

Preheat oven to 350 degrees. Generously butter a one pound loaf pan and dust with granulated sugar.

Puree beans in food processor until smooth - mine were of a crumbly consistency since the beans were a bit on the al dente side. Pour beans into a large bowl; stir in eggs, sugar, flour, baking powder, cinnamon and pineapple juice until well combined. Pour mixture into the loaf pan and bake for 30 minutes or until a toothpick inserted in the center comes out clean. After removing from the oven, sprinkle a pinch of kosher salt on top. Cool thoroughly, slice and serve!

Tuesday, May 18, 2010

Tolstoy and Tea

Lookie here!


Yep, I finally made it down to the library today to check out some classics from my mondo reading list. Tolstoy and Dickens made the first round. I’m going to tackle Tolstoy first!

In theme with my book choice, I wanted to make some Russian inspired cookies. You know to curl up on this grim and cloudy afternoon with Mr. Tolstoy and some tea, while nibbling on a yummy, yet sophisticated cookie. Well I searched and found a few recipes I liked. Unfortunately my choices are limited right now. I’ve been baking… and baking… and baking some more. Now I’m pretty much out of everything and anything until I get to the store.

That’s ok, though. It’s me The Improviser! I should have a big “I” on my chest!

I turned to my dad’s almond crescent recipe. Well I have no almonds, but I do have peanuts. I subbed in some peanuts for almonds, peanut butter for shortening, added some milk. Then, just to make things that much more interesting, I quartered the recipe. Here’s what came out of it!


Do peanuts go well with tea? They aren’t supposed to be very sweet cookies, which might make them go better with said tea. We shall see, young grasshopper, we shall see.

Update: I had a patty with my orange tea this morning... it was delicious!

Peanut Patties
2 tablespoons butter
1 tablespoon peanut butter
1 tablespoon tahini
1 tablespoon milk
1/4 teaspoon almond extract
1 1/2 tablespoons sugar
3 tablespoons crushed peanuts
6 2/3 tablespoons whole wheat flour
Pinch of salt

Cream together butter, peanut butter, tahini, milk, extract and sugar in a mixer. Add in peanuts and flour, mix until mixture starts to pull away from sides of the bowl. Take dough out and form into a ball. Wrap dough in wax paper and refrigerate for an hour at least. Remove dough and roll into little balls, placing on a buttered cookie sheet. Bake cookies 10-15 minutes, or until cookies are firm to touch.

Fiesta in a Casserole Dish


"Can you help me search for a recipe? I want to make a vegetarian dish to bring to the lock-in," Kyle says to me Friday afternoon.

Not one to turn down a recipe search, I accepted the challenge.

My first, and as it turned out, final, stop was the vegetarian section of Simply Recipes. I've followed Elise's blog for years. Everything I've ever made from her website has turned out beautifully. Whenever someone asks me for a recipe reference, I point them in the direction of her site. So when Kyle asked me for a vegetarian recipe, I linked him her Polenta Casserole recipe. Little did I know that this would spark my own creative juices flowing.

Once I started digging through my pantry and fridge, I realized I didn't have half of her listed ingredients. Never fear! Its in my DNA to substitute everything and anything in a recipe. Really, my mom does it, my Grandma does it... we've been trying for years upon years to recreate Grandma's spaghetti sauce recipe. We still haven't figured it out.

Mom says she spits in her sauce... I'll bet that's the secret...


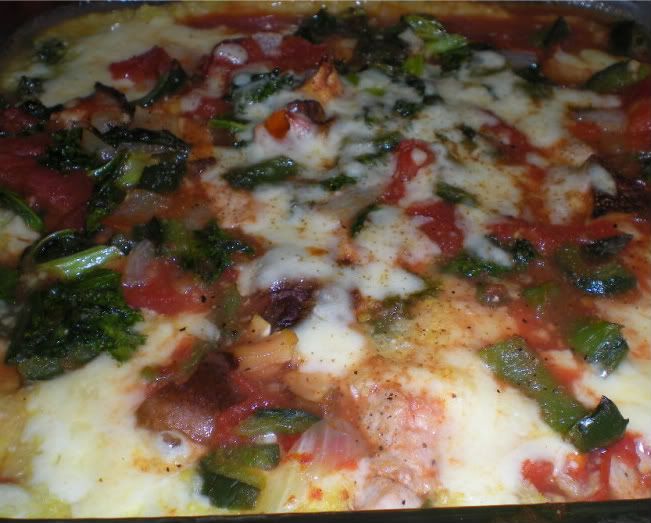
Anyway, I pinched here, tweaked there, added some sauteed pork and came out with a Mexican inspired casserole recipe. Deliciouso!

Mexican Grits Casserole
1 pork chop, seared in a hot pan with celery salt and pepper and chopped
3 tablespoons olive oil
1/4 vidalia onion, chopped
1 large pablano pepper, chopped
1/2 cup kale, chopped
1/2 cup chopped mushrooms (I used dried shitake, since that's all I had on hand)
4 garlic cloves, minced and divided in half
1 14.5 ounce can diced tomatoes
3 cups water
1 cup grits
1 cup grated cheese (just use your favorite, I used Mexican melting cheese)
Celery salt and pepper to taste

Heat olive oil in a large saucepan on medium heat and saute onion, kale, pablano and mushrooms, seasoned with celery salt and pepper, until onion starts to turn clear and kale starts to shrink down. Add in tomatoes, pork and 2 garlic cloves. Simmer for about 5 minutes, remove from heat and set aside.

Preheat oven to 350 degrees, brush an 8x8 glass baking dish with canola oil and set aside.

In a large saucepan, bring water to a boil. Add in garlic and a pinch of celery salt. Reduce heat to low, whisk in grits and cook until thick and cooked through. 
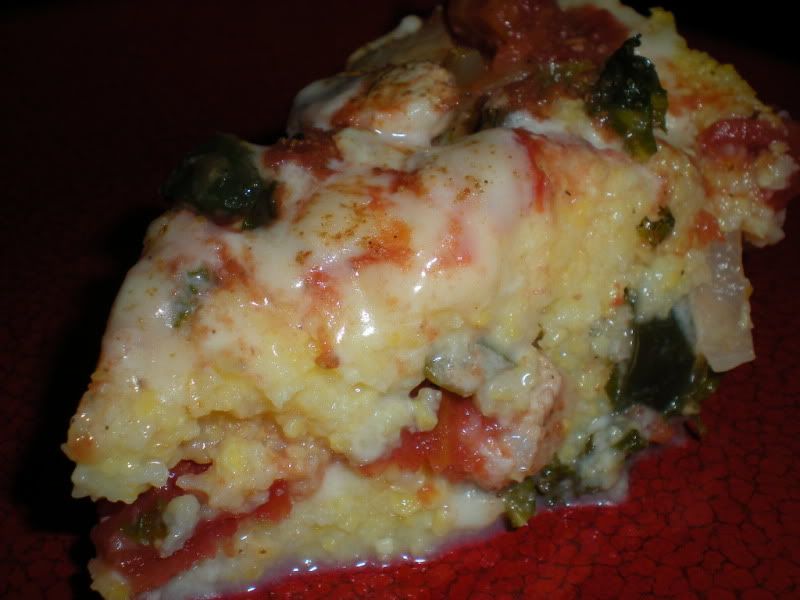
Be sure to wear socks during this step of the recipe... I burnt my foot from the spluttering grits!!

In prepared baking dish, spread 1/3 of the tomato mixture. Pour half the grits mixture on top of the tomato mixture, smoothing into corners. Sprinkle the grits layer with cheese. Repeat this process again, then top with the last bit of tomato sauce. I had a little cheese leftover, so I just piled it on top of the last layer.

Bake about 25 to 30 minutes and let cool about 15 minutes before serving. Like real live lasagna, this dish tastes delicious after sitting for a few days in the fridge.

The Amazing Purple GF Torte


I’m not gluten-free anymore, but I still enjoy baking that way once in a while. It’s refreshing to say that you’ve created something without flour! Though the torte was super difficult to get out of the pan, I enjoyed the bittersweet chocolatey pudding-y solidity of its consistency.

Yes that’s my technical term for the consistency of this cake.

Pudding-y solidity.

Want to hear the absolute best part of this recipe? I know you do...

It has 500 calories. No, not for a slice, for the whole entire cake! I know, it doesn’t seem possible, but oh my it is. I am tempted to sit down with a fork and the pan to eat the whole thing. Somehow I feel that would be a bad idea for my poor tummy, though. But hey, where else can you get such decadence for so few calories?

Purple GF Torte
1 14 ounce can beets (the kind with just beets and water), rinsed
1/4 cup cranberry sauce (I used canned, but you could probably use fresh, too)
1 tablespoon molasses
2 eggs
1/4 cup dark cocoa powder
2 1/2 teaspoons vanilla extract
1/2 teaspoon almond extract
1/4 teaspoon salt plus more for sprinkling

Preheat oven to 350 degrees. Grease a 9-inch cake pan, then dust with powdered sugar. Set aside for later use.

In a food processor, add beets, cranberry sauce and molasses. Puree together, then pulse in eggs, cocoa, extracts and salt until well blended. Pour mixture into the cake pan and bake for 30 minutes or until a toothpick inserted in the center comes out clean. Remove from oven and sprinkle with coarse salt. Cool the torte, slice and serve as desired.

Sunday, May 16, 2010

Banana-Rama Muffins


So today my Uncle Jerry, along with my cousins Serena and Kyle, from Missouri were visiting. They’ve been visiting quite a bit this past year. I’m big on family. Of course, you could tell that from my blog description I’m sure…

While I was so graciously washing the dishes for my parents, Serena sat on the bar stool next to me so we could chat. She just finished up her first year of college. Pre-med! I’m so proud of her! So proud I’m beaming!

*beam*

I wish she didn’t live so far away, though. It makes me sad.

On the plus side of her living so far away, this means I’ll get to mail her care packages! I love to send out care packages! I know how happy it makes my friends or family to get them. And college kids will eat anything, so I can put together some of my crazier recipes to send off to her! She put in a request for chocolate chip cookies… I can spice those up a bit! It’s so exciting!!

Of course I’ve got the whole summer before she goes back to school, but hey, I have something to look forward to!

That’s not what this recipe is about, however. This recipe comes from the banana sitting on my mom’s counter. It was overripe and I knew that the trashcan was it’s fate if I didn’t rescue it! So I swooped in and made it into some banana muffins! These muffins are of a crumbly Red Lobster biscuit type consistency. If you’re into super dense and moist muffins, I’d add about a 1/4 cup more milk to the batter.

Banana-Rama Muffins
1 cup all purpose flour
3/4 cup wheat flour
1/4 cup sugar
2 teaspoons baking powder
1 teaspoon garam masala spice mix
1/4 teaspoon salt
1 egg
1/2 cup milk
1/4 cup canola oil
1 mashed banana
1/4 cup peanuts

Preheat oven to 375 degrees. Combine flours, sugar, baking powder, garam masala, salt and peanuts in a bowl. In a separate bowl, whisk together egg, milk, oil and banana. Add wet mixture into dry and stir with a wooden spoon until just moistened. Fill muffin liners almost to the top and bake about 15 minutes or until a toothpick inserted in the center comes out clean. Makes about 11 muffins.

Saturday, May 15, 2010

Sweet Potato Granola


I’d like to start off this post with a shout out to Kankakee Natural Foods. This is and has been my favorite store in the area since I discovered its existence about a year ago. Best unsweetened dehydrated banana chips this side of the Rockies. Well maybe. I don’t really know what the deal is with banana chips over there in California. Probably pretty substantial, though. Maybe if I go over there someday I’ll find out.

Anyway, so I’m standing at the checkout counter with my granola-making purchases when I suddenly acquired a taste for dried blueberries. I asked the girl behind the counter if they ever dried their own blueberries. She said they didn’t, but they did get in packages of them. She walked over and grabbed them off the shelf to show me. It saddened me that they were teensy bags.

Damn blueberries for being so tiny and delicious and not being grown in my area – therefore expensive!! I thanked her for showing me and proceeded to the door as she returned the blueberries to their shelf.

Then the clouds parted! She waved me down and walked toward me carrying several shiny, beautiful bags of dried blueberries. It turns out that they were a few months past their shelf date and they weren’t allowed to have them on the shelf anymore. She said they were mine if I wanted them and all I’d have to do is just throw them out if they weren’t any good.

I thanked her profusely, practically jumped up and down like a child going to Disney World! Free dried blueberries! Woo-hoo!!

I rushed home to make my granola!


This recipe is inspired by a recipe for Maple Pumpkin Granola I ran across on Sugar Plum. I already have a favorite granola recipe, but it’s not exactly the most figure friendly one. It has lots of peanut butter, butter, honey and chocolate... I have to save it for special occasions.

So here’s my granola recipe. And if by some chance there’s some ingredient you find appalling, just swap it out with something you like! This mixture seems to be pretty delicious completely unbaked or even partially baked. Filling and delicious in any form!

Sweet Potato Granola
1 cup steel cut oats
1/3 cup rye berries
1/3 cup raw pumpkin seeds
1 cup unsweetened banana chips
1/4 cup dried blueberries
1/8 cup flax seed
1/4 cup All Bran cereal
1/4 cup unsalted peanuts
1 medium sweet potato, peeled and cooked
3 dried figs
1 tablespoon tahini paste
2 tablespoons olive oil
1 tablespoon unsalted butter
1 teaspoon mango extract
1/4 to 1/2 cup water
1/4 teaspoon kosher salt

Preheat oven to 350 degrees. Lightly oil a baking sheet with canola oil and set aside. In a bowl mix oats, rye berries, pumpkin seeds, banana chips, blueberries, flax seed, cereal and peanuts. In a food processor, puree sweet potato, figs, tahini, olive oil, butter, extract, water and salt. Combine oats mixture and sweet potato mixture. Spread onto the cookie sheet and bake for 45 minutes to an hour, stirring the ingredients up halfway through.

Thursday, May 13, 2010

Who Wants a Special Homemade Brownie??

Nutcrackers, giant rats, dancing sugar plum fairies...


It's Christmas in May! I have discovered a new (to me anyway) blog that has tickled my fancy like it’s never been tickled before. Normally I will not openly drool all over my keyboard at work, but that is exactly what the recipe for Mayan Mudslide Brownies over at Sugar Plum had me doing. Chocolate... mmm… avocado… mmmmmmm… more chocolate…Yep. Big ole’ puddles of drool shorting out the keyboard.


I made a few smallish adjustments to the recipe, so I’ll reprint it here, but I cannot take any of the credit for this idea! It was all Miss Sugar Plum. Her website is truly amazing. I spent hours reading through her recipes and laughing aloud at her fun-loving rambling wit. In one post she even remarks that she has an ice cream truck that drives down her street playing Christmas melodies… that’s quite a distance for that guy to travel in a few months just to sell ice cream, let me tell you.

Anyway, for months I’ve been looking for a brownie recipe I can be satisfied with. I usually end up with something too sweet, too fluffily cakey, too ordinary. I like my brownies uniquely dark tasting and dense. I believe I’m nearing the end of my search for Brownie Perfection with help from the SP Fairy!

Have a chocolate filled day!


Mayan Mudslide Brownies (the reproduction)
1/4 cup unsalted butter
4 ounces semisweet chocolate, coarsely chopped (I’d say unsweetened baking chocolate would work here too)
3/4 teaspoon coffee grounds
1 cup all purpose flour
2 tablespoons dark cocoa powder
3/4 teaspoon baking powder
1/4 teaspoon kosher salt, finely ground up plus 1/8 teaspoon
1 large avocado, peeled and pitted
1 cup granulated sugar plus 1 tablespoon molasses
1 teaspoon vanilla
1 large egg
1/4 cup chocolate chips, give or take depending on taste
1/3 cup chopped peanuts
1/3 cup sweetened coconut flakes
1/4 cup dulce de leche, canned

Preheat oven to 375 degrees. Line 8x8-inch baking dish with foil and coat with canola oil.

Melt butter in a small saucepan over low to medium heat. Turn heat off and stir in chopped chocolate and coffee until melted and smooth. Remove from heat and set aside.

In a medium bowl, stir together flour, cocoa, baking powder and 1/4 teaspoon salt until well combined. In Kitchen Aid mixing bowl, beat avocado on medium speed until it starts to get creamy. Beat in sugar and molasses until well incorporated, then add in vanilla and egg until combined thoroughly. Beat in melted chocolate mixture, then reduce mixer speed to low and beat in flour mixture until combined.

Spread batter evenly into prepared dish. It helps to oil the spatula you’re spreading the mixture with so it doesn’t stick. Sprinkle chocolate chips over the surface of the batter, followed by the peanuts, coconut and the remaining salt; bake 15 minutes. Remove dish from oven and heat dulce de leche in microwave until its liquid-ish then drizzle over brownies. Return the dish to the oven and bake an additional 10-15 minutes or until well risen and set. I stuck a toothpick in the center and when it came out mostly clean along with the other signs I decided it was done. Cool completely on a wire rack (or upside-down pizza pan if you’re ghetto-ing it up like me) and refrigerate for easier slicing.

To slice, lift out foil and slice brownies into bars. Supposed to make 16 brownies.

Update:
These brownies were a HUGE hit both with my mom and at the bank. One of the loan officers even asked for the recipe. I happily passed it on! =)

Tuesday, May 11, 2010

Root Beer Cupcakes


I was visiting my new blog haunt, Cupcake Project, yet again today. Among a ton of recipes I found that I just HAVE to make, I stumbled across her recipe for root beer cupcakes. I promptly printed out the recipe and rushed home (well, after work was actually over and I was able to leave) to bake them! Mmm root beer! The perfect pick-me-up plus the second perfect soda in the world! The first, of course, is Dr Pepper. I didn't follow the recipe for frosting on the website since I didn't have any of those ingredients. I also used my trusty Kitchen Aid mixer instead of mixing by hand. I'm a cheater!! I managed to finagle a frosting recipe out of my Better Homes and Gardens New Junior Cookbook I've had since I was a wee baker. Now my decorating abilities aren't quite up to speed, but at least it tastes good! The beauty will come! I did add a malted milk egg to each cupcake after frosting, though! I've recopied the recipe here since I made a few additions and changes. Enjoy the delicious fluffiness of baked root beer!

Root Beer Cupcakes
1 cup root beer soda
1 teaspoon apple cider vinegar
3/4 cup sugar
1/3 cup canola oil
1/2 teaspoon vanilla extract
2 teaspoons root beer soda
1 1/3 cups flour
1/4 cup whole wheat flour
3/4 teaspoon baking soda
1/2 teaspoon baking powder
Pinch kosher salt

Preheat oven to 350 degrees. Combine the cup of root beer and vinegar. Allow to sit for a few minutes. In a separate bowl, combine flours, baking soda, baking powder and salt; set aside. Pour root beer/vinegar mixture into bowl of mixer. Add in sugar and oil, mixing vigorously until slightly frothy. Toss in vanilla extract and teaspoons of root beer. Add flour mixture and mix until just moistened. Fill cupcake liners 3/4 full and bake 18 to 22 minutes or until a toothpick inserted comes out clean. Makes 12 cupcakes.


Vanilla Bean Icing
Now this recipe I found to be entirely too sweet the way I altered it, so I altered it some more. I'll post the first way I made it as well as the changes I made after it was finished.
1/4 cup plus 2 tablespoons Vanilla Bean Chiller powder mix(from Tastefully Simple)
1/2 cup powdered sugar
2 tablespoons unsalted butter
1 1/2 tablespoons root beer

Sift together Vanilla mix and powdered sugar, set aside. Melt butter over the stove, then transfer to a bowl. Add root beer to butter. Mix in half the sugar mixture, stir with a wooden spoon until smooth. Add in remaining sugar mixture.

Since I found the frosting too sweet for my liking, I melted another tablespoon of butter over the stove. While still in the pan I added a tablespoon of root beer, a pinch of kosher salt (to taste) and a tablespoon (roughly) of whole wheat flour to make a thick rue. I then mixed the rue into the frosting. Then I piped it onto the cupcakes and topped them with the malted milk eggs.

Sunday, May 9, 2010

The Unbearable Lightness of Bean

On Prudence Pennywise, a blog I follow, I was struck by her post about a recipe for "unrefried beans". I am a huge fan of refried beans but the whole lard factor is pretty off-putting if you're watching your girlish figure. Seeming to read my mind, my mom produced a bag of dried pinto beans from her magical pantry and my dream of reproducing this recipe became a reality! I followed the recipe mostly, adding a bit more water since I did not use a can of taco sauce. I diced up a few jalapenos and some garlic amongst a few other choice ingredients and my concoction has been simmering in the crockpot for a few hours. I look forward to tomorrow morning when I can mash the beans up and see how the recipe turned out. Beans, beans, beans!!

Update: This morning I padded out of the bedroom at 2:30 toward the heavenly aroma the crockpot was emitting. I removed the lid and peered inside.. Now for all the good smells in the world, pinto beans are just not pretty. You won't find a photo of them here but I will tell you that they tasted just delicious. But I'm getting ahead of myself here. I turned that crockpot off (it had been simmering for 7 hours at that point) and went back to sleep. After waking up for real this morning, the beans mostly cooled, I followed a suggestion posted on Prudence Pennywise's site. A clever blogger stated that he or she used a slotted spoon to ladel the beans into their kitchen aid and mash them up using the paddle on the second setting. This worked like a dream and saved me from having to use those arm muscles to mash em up. I saved the "stock" the beans created and used it to cook my fish for lunch. Protein OVERLOAD! =)

Mint Marinade

So a few nights ago, I was experimenting with some marinades for some eye of round I was cooking for dinner. My friend Amanda had dropped off some fresh mint leaves from her mom's garden. I've been using it in everything from my coffee in the morning to crushing it for my lemonade. I figured I'd give it a shot with the beef! I chopped up a half of a jalapeno, some fresh garlic, a handful of the fresh mint and a few tablespoons of pomegranate balsalmic vinegar I had on hand. I marinated the steak, after cutting it into bite sized pieces, in the fridge for a day. I then seared it in a pan on the stove using a bit of extra virgin olive oil and stuck it in the grits I whipped up for dinner. Aside from salting the grits a bit heavily, the dish was pretty tasty. I mean, who doesn't love steak flavored grits??

Saturday, May 8, 2010

Frosted Pickle Cupcakes


I was cruising the blogs yet again today and ran across one of the most intriguing things I have seen in a long time: Pickle Cupcakes. Yep, you read that right – pickle flavored cupcakes. I even added pickle frosting! Now 95% of you will think that these are the most disgusting things you could possibly fathom but I am here to tell you that I love them! Unfortunately my mom does not - she is of that 95%. Oh well! Can't win em all!!

I discovered this recipe on Cupcake Project's website and changed a few ingredients around to use up what I actually have in the pantry. So if you’re a member of that 5%, fire up those mixers and get baking!

Pickle Cupcakes
1 cup all purpose flour
3/4 teaspoon baking powder
1/4 teaspoon baking soda
1/2 teaspoon ground dill
1/2 teaspoon salt
1/2 teaspoon dry chopped onion
3 tablespoons tahini paste
3 tablespoons canola oil
1/3 cup sugar
1 egg
1/3 cup greek yogurt
1/3 cup dill pickle juice (straight from the jar)
1/3 cup finely chopped pickles (I used some sweet ginger gerkins but the recipe calls for dill)

Preheat oven to 350 degrees. Whisk together flour, baking soda, baking powder, dill, salt and onion in medium bowl. In another bowl, cream together tahini, oil, sugar, yogurt and egg until well blended. Add in pickle juice and flour mixture, followed by the chopped pickles. Fill muffin liners 2/3 full and bake 20 minutes or until toothpick inserted comes out clean. Makes about 8 cupcakes.


Royal Pickle Icing (makes just enough to frost the cupcakes)

1 cup powdered sugar
2 1/2 teaspoons meringue powder
2 1/2 tablespoons dill pickle juice

Beat on high with hand mixer until the mixture forms stiff peaks. Add a few drops of green food coloring if desired. In the picture the icing is still wet, but it does harden as it dries.

Friday, May 7, 2010

Blue Tahini Muffins


So after the awesome success of those chocolate muffins I baked a few days ago I decided to try a different take on them. Same basic recipes, but substituting more exotic ingredients. I had tahini paste in the fridge and subbed that in for oil, adding more milk to balance the consistency out a bit. I'm a nut for grains, so I mixed it up in that department quite a bit. I've been storing the muffins I make in the freezer and even after a spin to defrost in the microwave, these muffins are still deliciously moist. In fact.. I'm craving another one now..

Blue Tahini Muffins
3/4 cup old fashioned oats
1/4 cup blue cornmeal
1 tablespoon apple cider vinegar plus enough milk to equal 1 cup plus 1/2 cup
1/3 cup tahini paste
1/3 cup sugar
1 egg, beaten
1 teaspoon vanilla extract
1/2 cup all purpose flour
1/2 cup whole wheat flour
1/4 cup raisin bran cereal
1 teaspoon baking powder
1 teaspoon kosher salt
1/2 teaspoon baking soda

Preheat oven to 400 degrees. Line muffin pan with muffin liners. Stir oats, cornmeal and milk mixture, set aside while other ingredients are combined. Whisk together tahini, sugar, egg and vanilla. Add egg mixture into oats mixture. Combine flours, cereal, baking powder, salt and baking soda, then add into wet ingredients until moistened. Fill muffin liners 2/3 full and sprinkle kosher salt on top. Bake for about 12 minutes or until a toothpick inserted in the center comes out clean.

Wednesday, May 5, 2010

Crockpot Garam Masala


Thanks to a recent trip to the grocery store, I finally had a chance to create my own chicken recipe using the garam masala spice mixture Kyle so thoughtfully sent to me. I've recently grown very fond of green peppers, but if you're not a fan you could substitute any other color you'd like. This recipe was rich in flavor, incredibly tender and would taste fantastic over a bed of rice. I hope you enjoy it as much as I did!

Crockpot Chicken Garam Masala
4 chicken thighs
1 tablespoon garam masala
1/2 teaspoon powdered ginger
1 plum tomato, diced
1/2 vidalia onion, diced
1/3 green pepper, thinly sliced
4 cloves garlic, thinly sliced
2 1/2 cups water (or chicken stock)
1 tablespoon butter
Salt and pepper to taste

Rinse chicken thighs and massage garam masala and ginger into chicken. Set in crockpot. Add all remaining ingredients and refrigerate overnight to allow flavors to blend. To prevent crockpot from cracking, allow dish to sit out for an hour before heating. Turn crockpot on low and simmer for around 8 hours. The chicken was so tender that the meat just fell off the bone. Pretty low maintenance, but definitely delicious in my eyes.

Dark Chocolate Oatmeal Muffins


More chocolatey goodness here - dark chocolatey goodness. Let's put it this way: this recipe is for the serious chocolate lover. I took a chocolate oatmeal muffin recipe I had found, used dark chocolate powder, and cut the sugar amount in half. I also added in some blueberries since I'm obsessed with fruit and chocolate combinations lately. I've actually been crumpling up the muffins, heating them in the microwave, pouring milk on top and eating them as cereal. Yes it's a bit strange, but man is it delicious!

Dark Chocolate Oatmeal Muffins
1 cup old fashioned oats
1 tablespoon apple cider vinegar plus enough milk to equal 1 1/3 cups
1/3 cup canola oil
1/3 cup sugar
1 egg, beaten
1 teaspoon vanilla extract
1/2 cup all purpose flour
1/2 cup brown rice flour
1/4 cup dark cocoa powder
1 teaspoon baking powder
1 teaspoon kosher salt
1/2 teaspoon baking soda
Handful blueberries (optional)

Preheat oven to 400 degrees. Line muffin tin with the paper cups and set aside.

Stir together oats and milk mixture, allow to stand while you gather other ingredients. In another bowl, stir together oil, sugar, egg and vanilla. Add oats mixture and stir well. Mix together flours, cocoa, baking powder, salt and baking soda. Toss in the blueberries now, too. Blend into oats mixture until just moistened. Fill muffin cups 2/3 full and bake about 15 minutes or until a toothpick inserted comes out clean. Enjoy!

Tuesday, May 4, 2010

(Chili Pepper) Sugar Cookies

TADA! The surprise is revealed!


Cute huh??

So it took a few days to make these delicious treats, but boy were they worth the wait! I finally got to use my little chili pepper cookie cutter to make these little bite sized cookies to send to Kyle for Cinco de Mayo. I even made my own frosting - how very Martha of me! I had cookies coming out of my ears and was so proud I brought them everywhere I could think of! I adapted the recipe from Alton Brown's recipe on the Food Network's website, but I added some lime zest to give them some flair! I still have some of the original dough in the fridge and have since I've adapted the recipe yet again - chocolate with orange zest. So if you've got some time on your hands - I advise whipping up a batch of these buttery, limey, sugary treats! Enjoy!


Sugar Cookies with Lime Zest (original recipe courtesy of Alton Brown via foodnetwork.com)
3 cups all purpose flour
3/4 teaspoon baking powder
1/4 teaspoon salt
1 cup unsalted butter, softened
1 cup sugar
1 egg, beaten
1 tablespoon milk
Zest of one lime
Powdered sugar for rolling out dough

Sift together flour, baking powder and salt, set aside. Whip together butter and sugar until light in color. Add egg, milk and lime zest, continue mixing. Turn mixer to lowest setting and slowly add flour mixture. Beat until mixture pulls away from the side of the bowl. Divide the dough in half, wrap in waxed paper and refrigerate for at least 2 hours (now normally I'm not a very patient person when it comes to waiting and food, but it's definitely worth it)

Preheat oven to 375.

Remove dough from the fridge. I found that it was a tad easier to roll if it sat out at room temperature for 3 or 4 minutes. Sprinkle work surface with powdered sugar before setting dough down. Sprinkle the top of the dough with powdered sugar before rolling so the rolling pin doesn't eat the dough! The recipe says to roll the dough until it's roughly 1/4 inch thick. I'm horrible at knowing how thick my cookies are, so I just guestimated and rolled the dough out to my liking. Cut out the cookies with your favorite cookie cutter and place the dough on a greased cookie sheet, just far enough apart so they don't touch. Bake 7-9 minutes or until they start to brown around the edges. Let sit on the cookie sheet for 2 minutes, then remove and place on a cooling rack. Make sure the cookies are completely cool before frosting, or eat them warm (or cooled) without frosting! They're quite delicious!

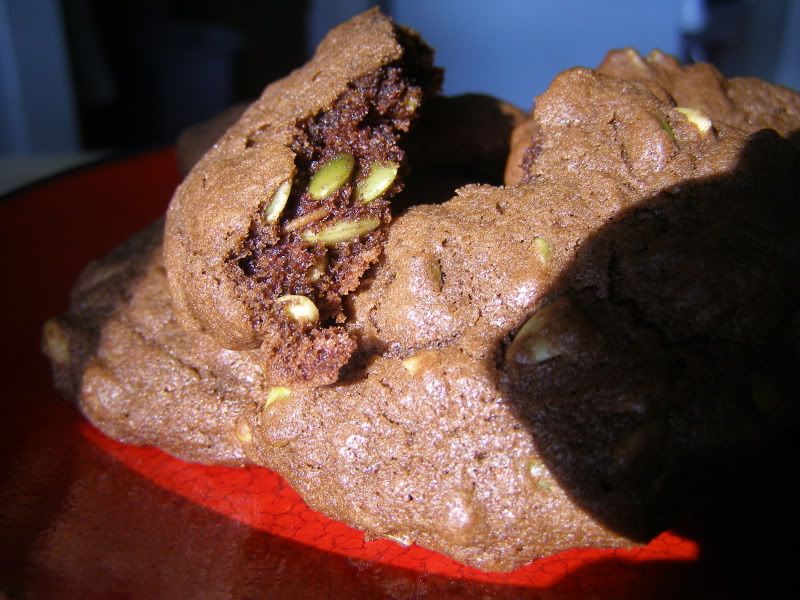
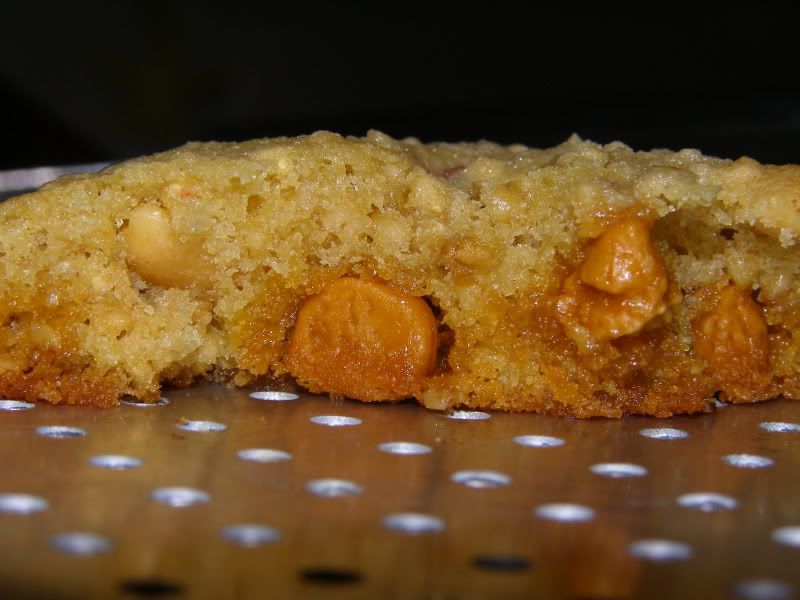
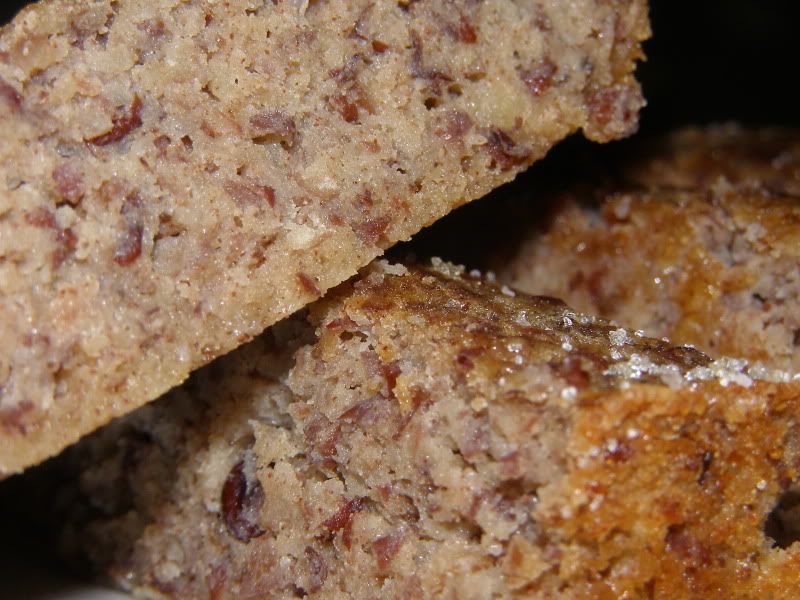
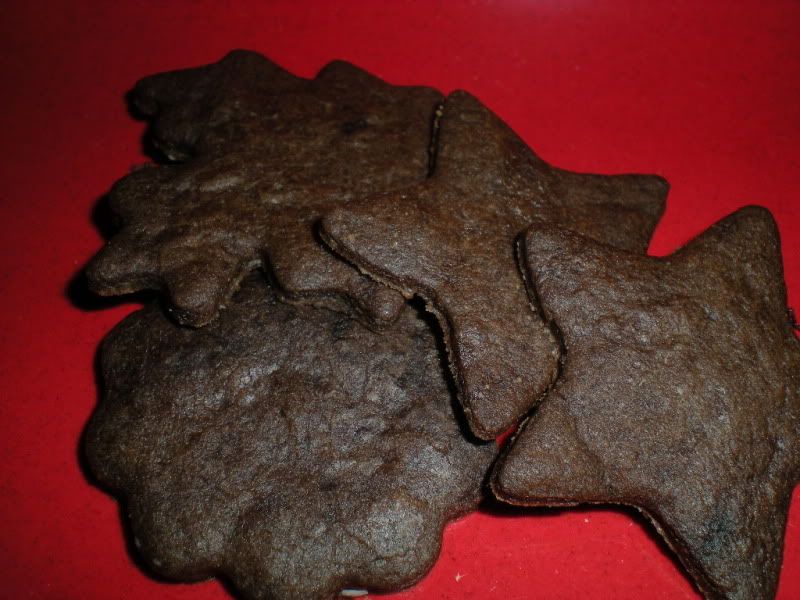
(some more cookies I just "rolled out" last night to mail to a friend in Virginia!)

Alternate recipe:
Chocolate Sugar Cookies with Orange Zest
2 3/4 cups all purpose flour
1/4 cup cocoa powder
3/4 teaspoon baking powder
1/4 teaspoon salt
1 cup unsalted butter, softened
1 cup sugar
1 egg, beaten
1 teaspoon vanilla extract plus enough milk to make 1 tablespoon
Zest of one orange
Powdered sugar mixed with cocoa powder for rolling dough

Follow the above instructions, the outcome will just be CHOCOLATEY as all getout!